
Hello! Long time no post - I went back to work full time and full time job + pre-schooler + husband at university left me with very little time to sew or blog. But there's a new angel child in the family, I'm on maternity leave with a baby who actually sleeps and the pre-schooler is now at school, so there will hopefully be more sewing and more blogging than ever before.
Motivating me to get started, I'm excited to join the 'Magnificent Wizards' blog tour hosted by Made for Little Gents. And what a perfect tour to join - anyone whose met my boy knows that he LOVES to dress up, and even when not dressed up he is often 'in character' as a dog or a cat or superhero (or a super-cat-dog, because why limit yourself?)
The boy has requested multiple Halloween costumes this year, I'm starting with Pikachu because I know it will continue to be used through out the year - to be honest he wears his pumpkin costume from last year on a regular basis, so they'll all get used but I expect this one to be particularly popular.
As the basis for this costume I'm using the Grow On Romper by Apple Tree Patterns - I'm loving these patterns at the moment for 2 reasons, firstly the obvious - they grow with your child, which means you get multiple years out of your hard work, rather than having them growth spurt out of it within a few months. Secondly, my boy has a long torso and short legs, so an adjustable romper means I can have a age 5 body with age 3 legs without having to adjust the pattern in advance. You could use another hooded pattern if you prefer, just choose one with a 3 piece hood.
Materials you will need are yellow fleece (amount required for your pattern) and scraps of pick, black and brown fabric. I also used a yellow stretch cotton for lining on the hood as my fleece was quite thick.
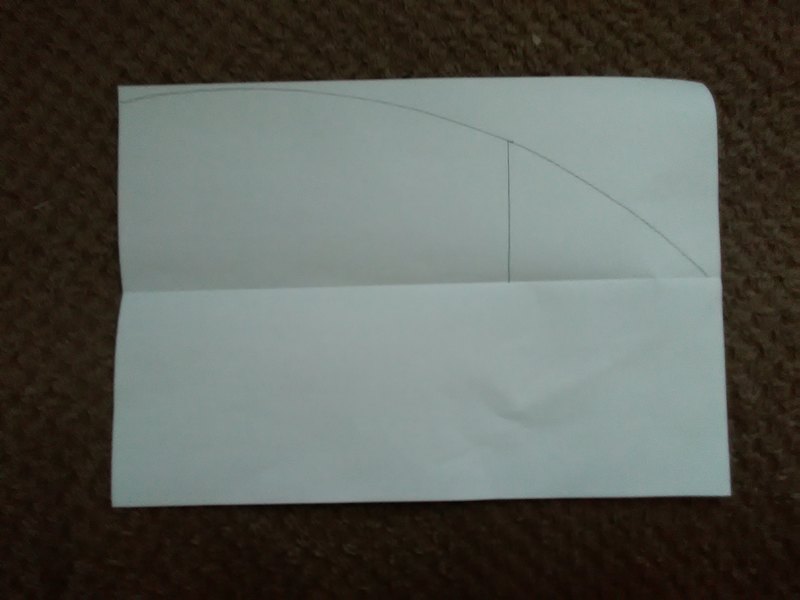
To make Pikachus ears I folded a piece of A4 (or letter) paper in half lengthwise. I then sketched a curve the full width of the paper at one end and meeting the central fold at the other. Finally, draw a vertical line approximately 2/3 along the ear to segment it into yellow and black. Add your seam allowance either side of this line - I did this as I cut it out, but if you're not confident you can trace around your pieces on another sheet and add the seam allowance using a ruler, to create your final pattern pieces.
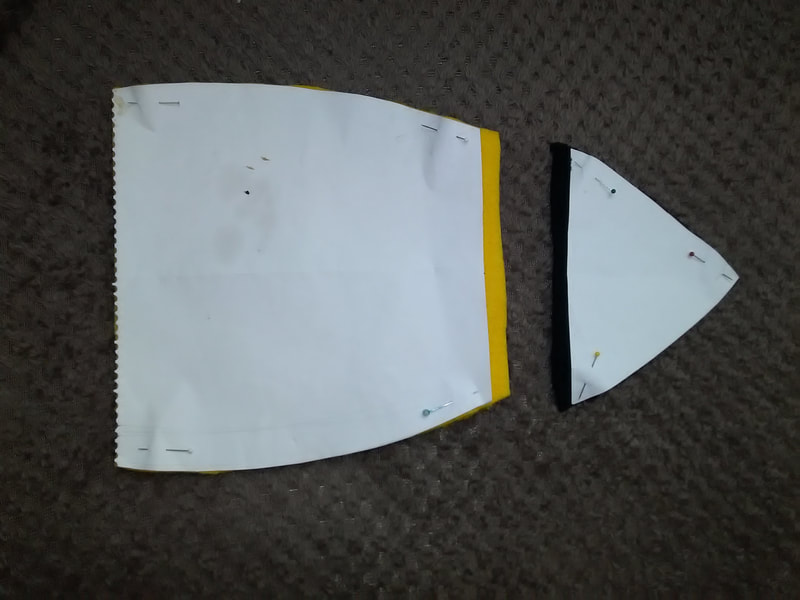
To assemble, join the black and yellow sections, then fold in half and sew along the curved edge. Turn inside out and hand to impatient 4 year old with a bag of stuffing while you get on with assembling the romper. You want to stuff the ears firmly so they will stick out a bit and not flop. Once the ears are stuffed, squash them flat at the open end so that the seam is in the centre of one side. Create a sandwich of hood side, ear, hood gusset with the ear positioned approximately 4 inches (10cm) from the face edge of the hood and sew it all together.
|
|
Before lining the hood, add a pink circle to each side piece for Pikachu's cheeks - don't do what I did and use a stretch fabric for this as it will be very hard to avoid puckers forming! You will also want to add brown stripes to the back before assembling - I didn't and still need to add these.
For the tail, cut out a zig zag shape from your yellow fleece, with the final segment being much wider and longer. You want the total length of the zig zag to reach from the bottom to the shoulders of your child. Pikachu has brown segment at the base of his tail, I added this by first cutting 2 tails from the yellow fleece, then sewing a 10cm square scrap of brown onto one tail piece at the first segment right sides together and flipping it over to enclose the seam. Then treat this as one piece and sew the two tail sections together right sides together and then turn. I didn't stuff the tail as it always appears very two dimensional in the cartoon, but may go back and add some stiffening later.
Sew the tail to the bottom of the romper, and attach at the top using a short piece of elastic or cord - this should allow the tail to move while still keeping it upright.
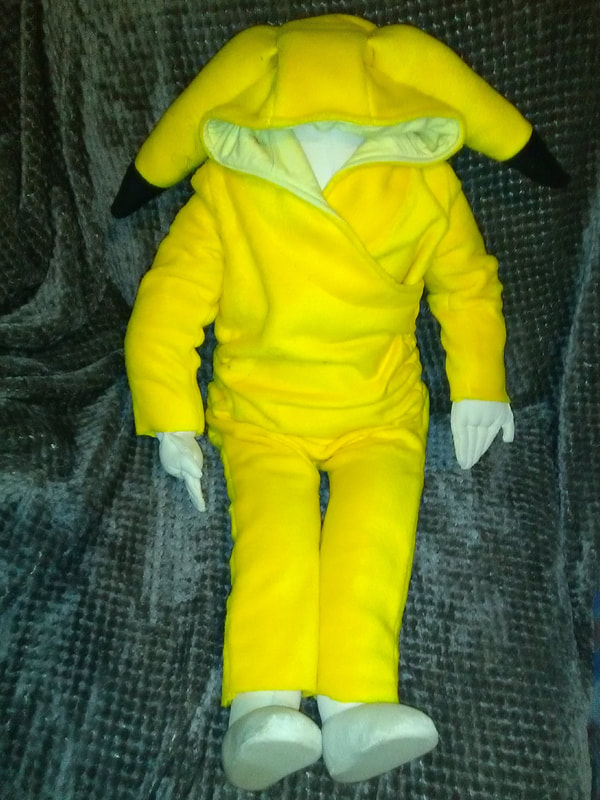
Unfortunately pikachu wasn't finished until after angel boy went to bed, so I can only share a picture on the mannequin. As soon as he's gets home from school tomorrow I know he's going to want to try it on so I'll be updating with some better pictures later!
For the tail, cut out a zig zag shape from your yellow fleece, with the final segment being much wider and longer. You want the total length of the zig zag to reach from the bottom to the shoulders of your child. Pikachu has brown segment at the base of his tail, I added this by first cutting 2 tails from the yellow fleece, then sewing a 10cm square scrap of brown onto one tail piece at the first segment right sides together and flipping it over to enclose the seam. Then treat this as one piece and sew the two tail sections together right sides together and then turn. I didn't stuff the tail as it always appears very two dimensional in the cartoon, but may go back and add some stiffening later.
Sew the tail to the bottom of the romper, and attach at the top using a short piece of elastic or cord - this should allow the tail to move while still keeping it upright.
Unfortunately pikachu wasn't finished until after angel boy went to bed, so I can only share a picture on the mannequin. As soon as he's gets home from school tomorrow I know he's going to want to try it on so I'll be updating with some better pictures later!

See what other bloggers are making boys for Halloween by following along on our Magnificent Wizards Blog Tour! Each link will be available the day of or after as posted below.
Fri. Sept. 28 | Made for Little Gents (Intro to Magnificent Wizards Blog Tour)Mon. Oct. 1 | Angel Child Clothing
Tues. Oct. 2 | Made for Little Gents
Wed. Oct. 3 | Big Fly Notion
Thurs. Oct. 4 | Tenille's Thread
Fri. Oct. 5 | Sewing Novice
Mon. Oct. 8 | Paisley Roots
Tues. Oct. 9 | Custom Made by Laura
Wed. Oct. 10 | Fée bricolo
Thurs. Oct. 17 | The Sewing Goatherd
Fri. Oct. 12 | Manning the Machine

 RSS Feed
